 Xiaohongshu Examples and TutorialsFind more hand-drawn map examples and usage tutorials on Xiaohongshu. Welcome to check them out.View Details
 Tutorial
Follow the steps to select an area, create a base map, adjust colors, place assets and buildings, add markers, and export your first illustrated map. AI layout runs only when you choose to use it.
No. 1 Steps
Create New Guide Project and Select Area
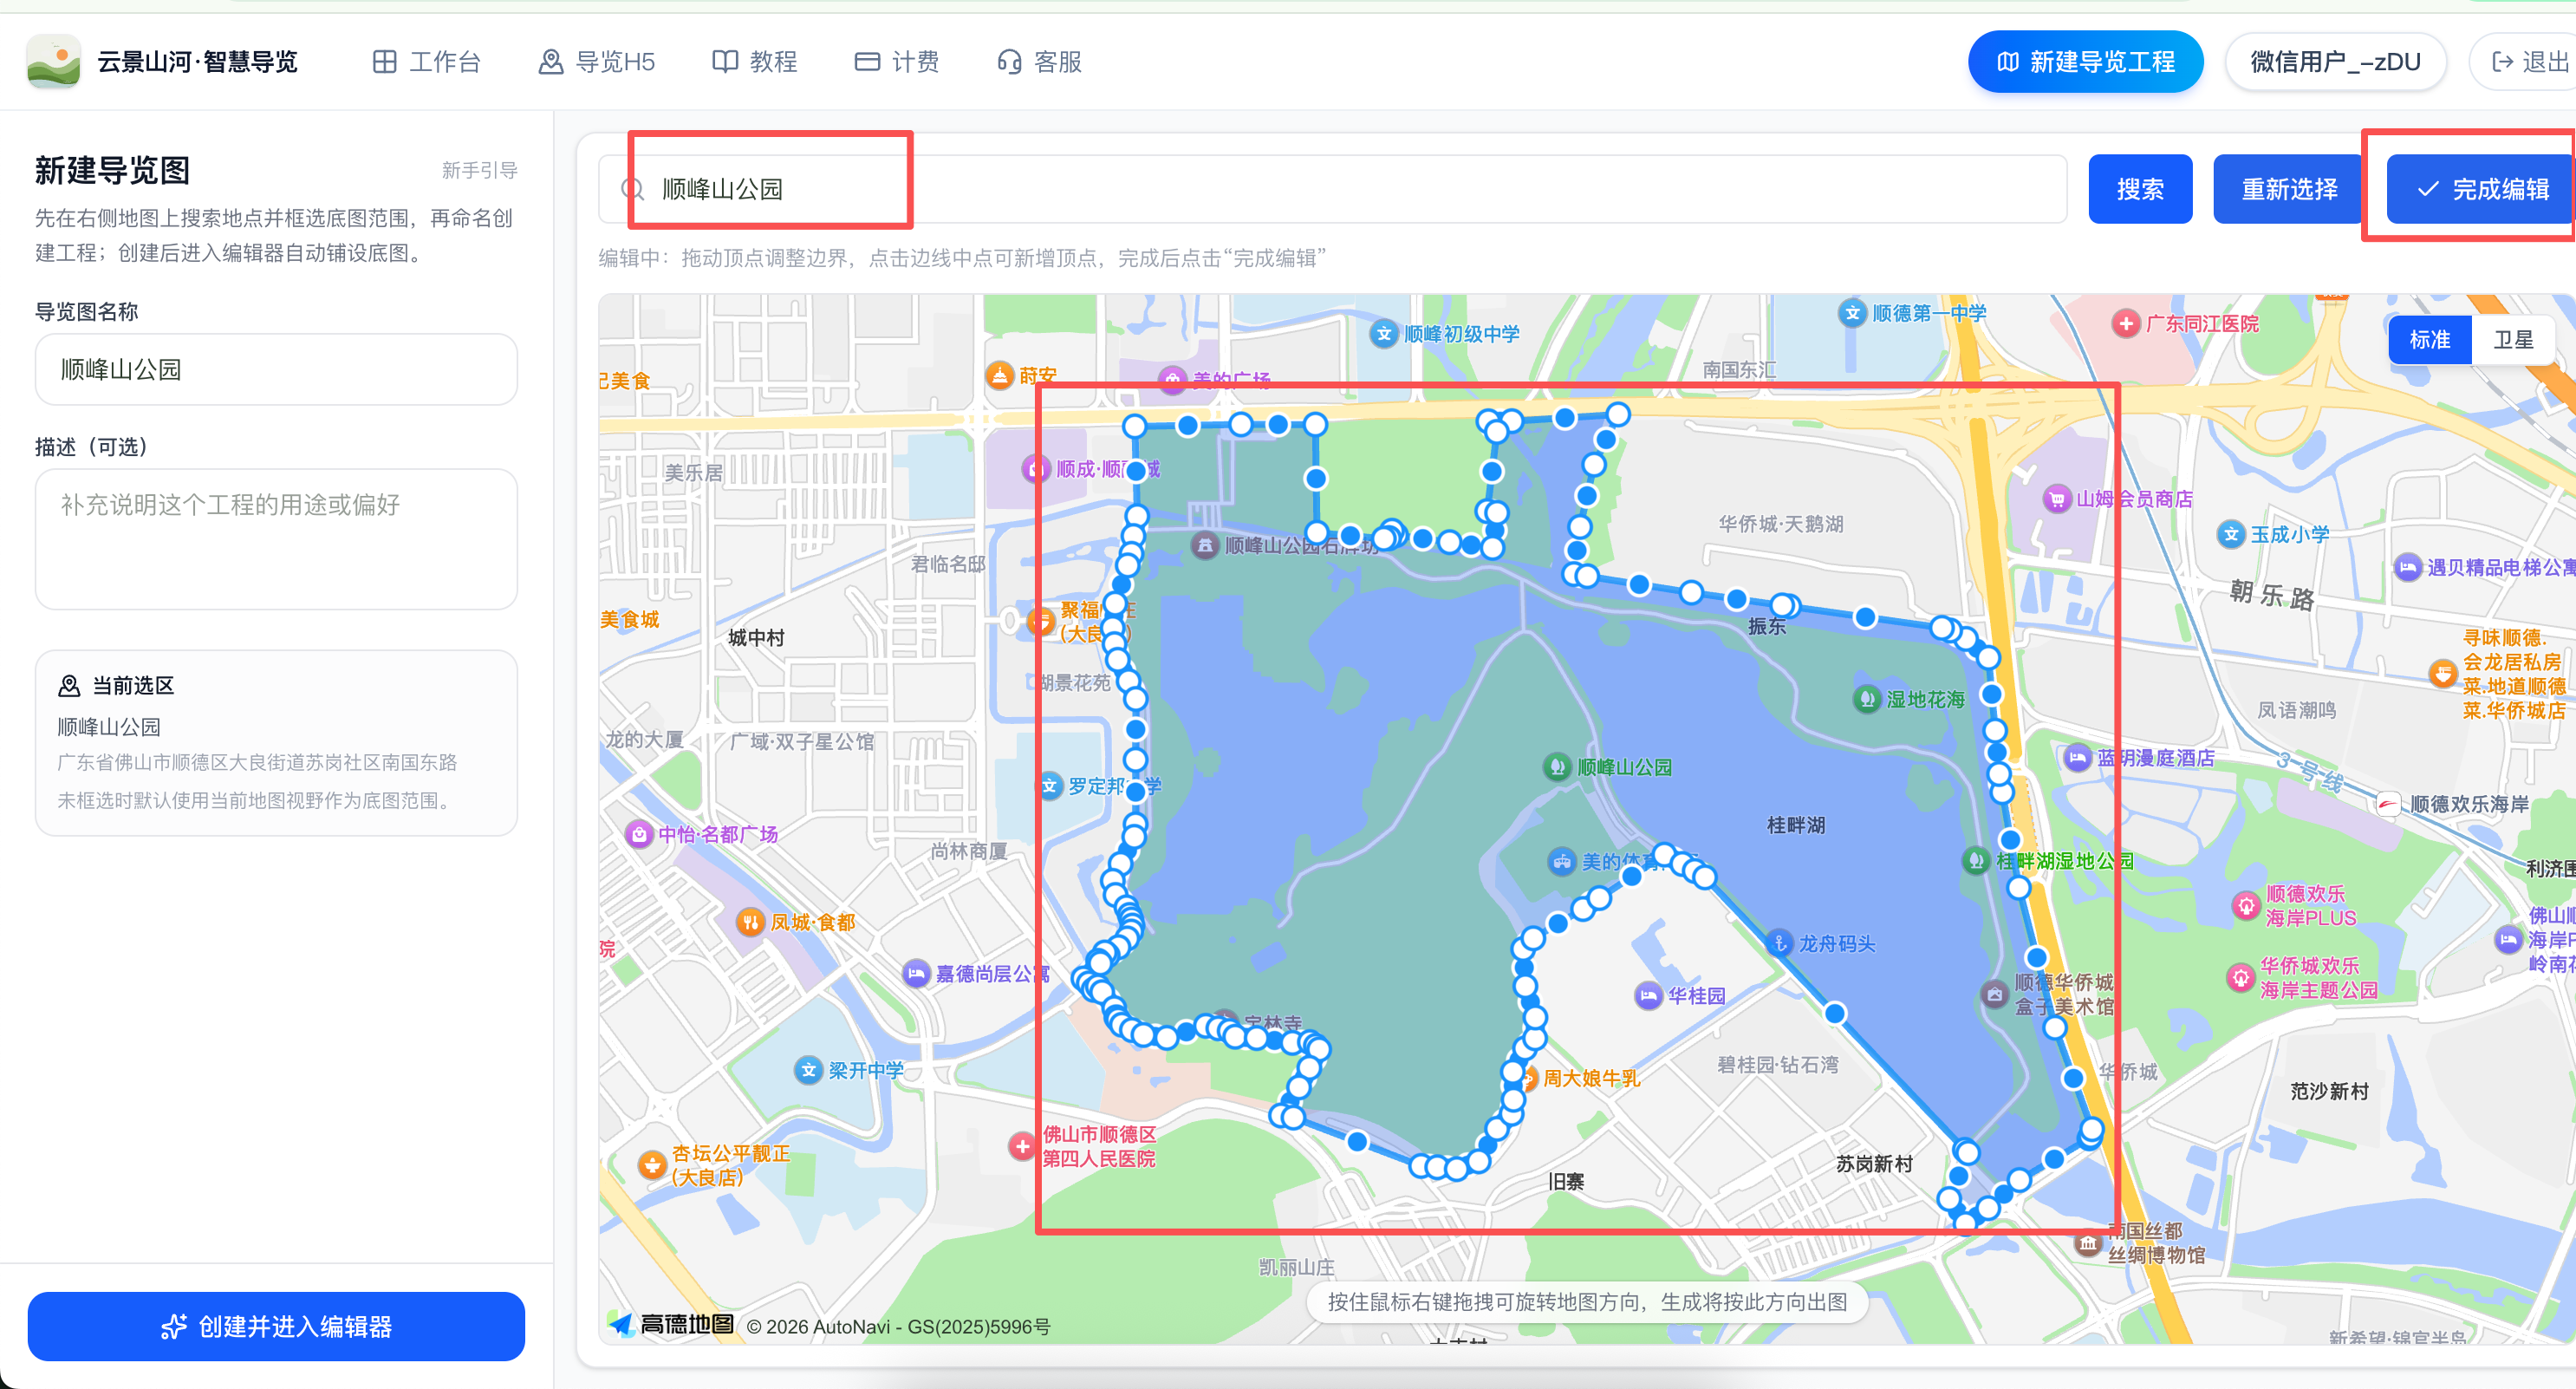
Open “Create a map” from your workspace. Search for an attraction or park on OpenStreetMap, or drag the map to find your location.
Use the marquee tool to outline the navigation range; the selection supports rotation to fit the orientation of the scenic area. It is recommended that the range cover all touring areas and main entrances/exits. Confirm to create the project.
No. 2 Steps
Lay Base Map and Apply Thematic Coloring
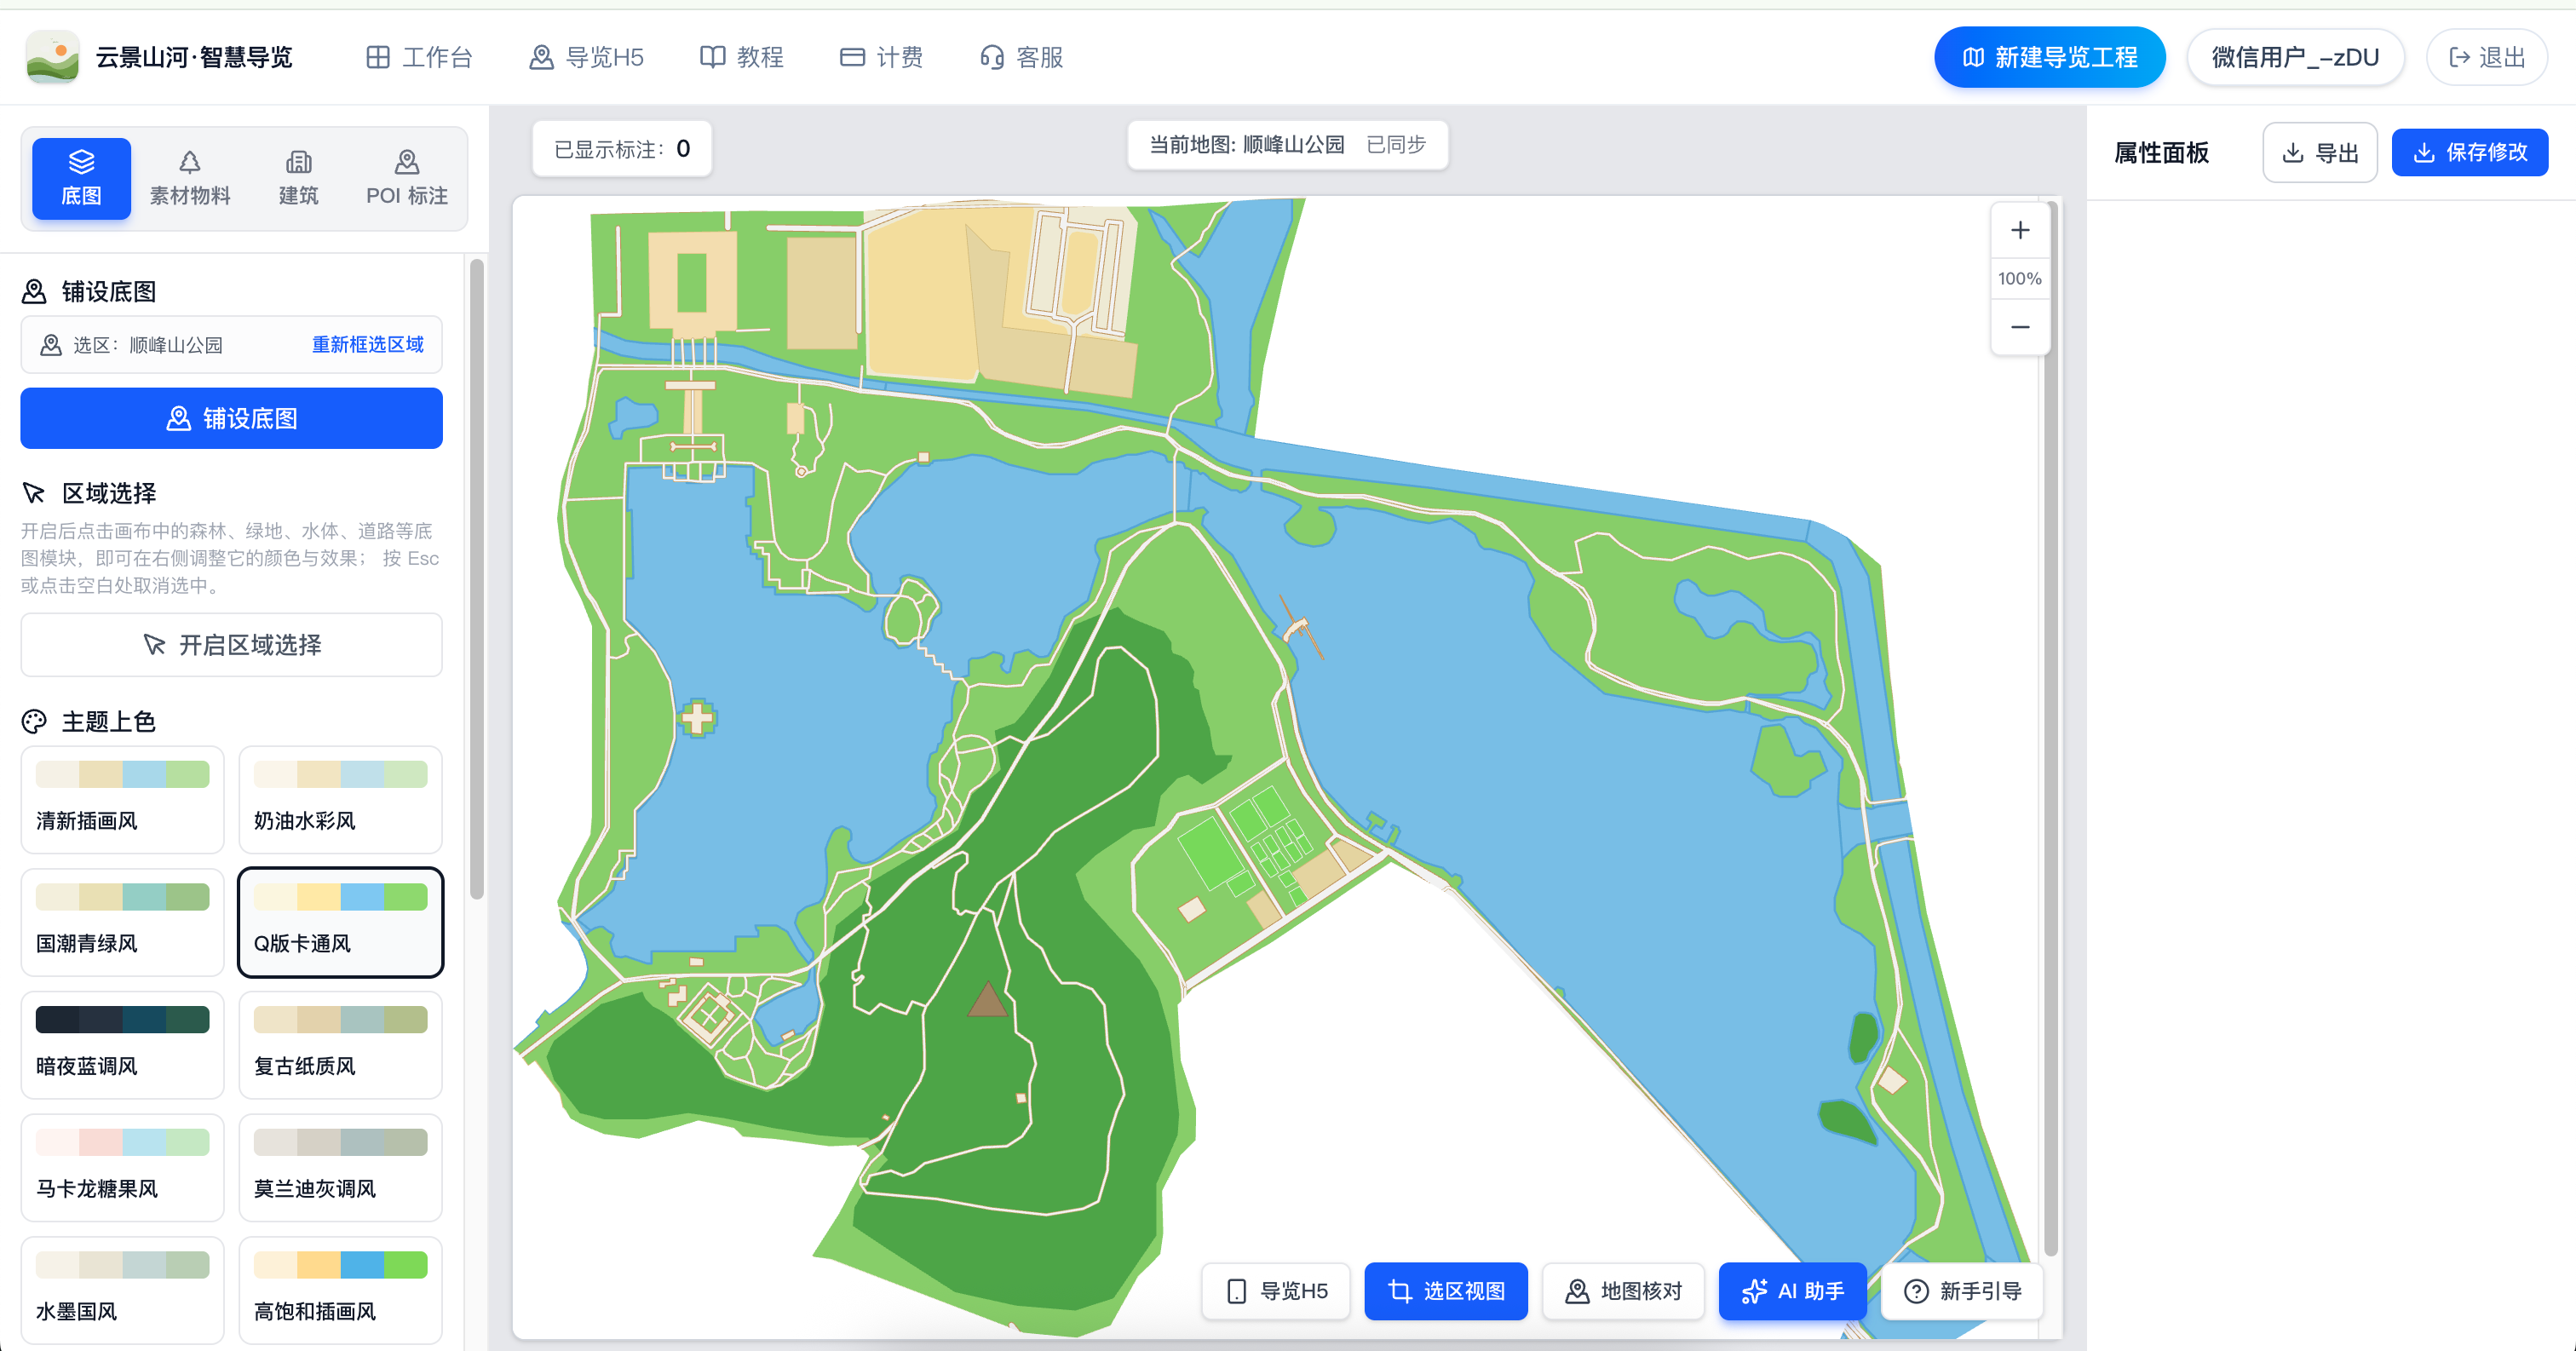
After creating a project, the system automatically lays out the vector base map based on the real terrain of the selected area: water systems, green spaces, roads, building blocks, and mountains are all included, no hand-drawing required.
The preset color palettes in the "Theme Coloring" panel (Fresh Illustration Style, Cream Watercolor Style, National Trend Style, Cartoon Style) let you switch the entire color scheme with one click; the custom color palette below allows fine-tuning of 20 elements such as ground, water systems, green spaces, and roads one by one. All changes take effect instantly without regenerating the map.
No. 3 Steps
Assets (public library / AI generated / uploaded / searched)
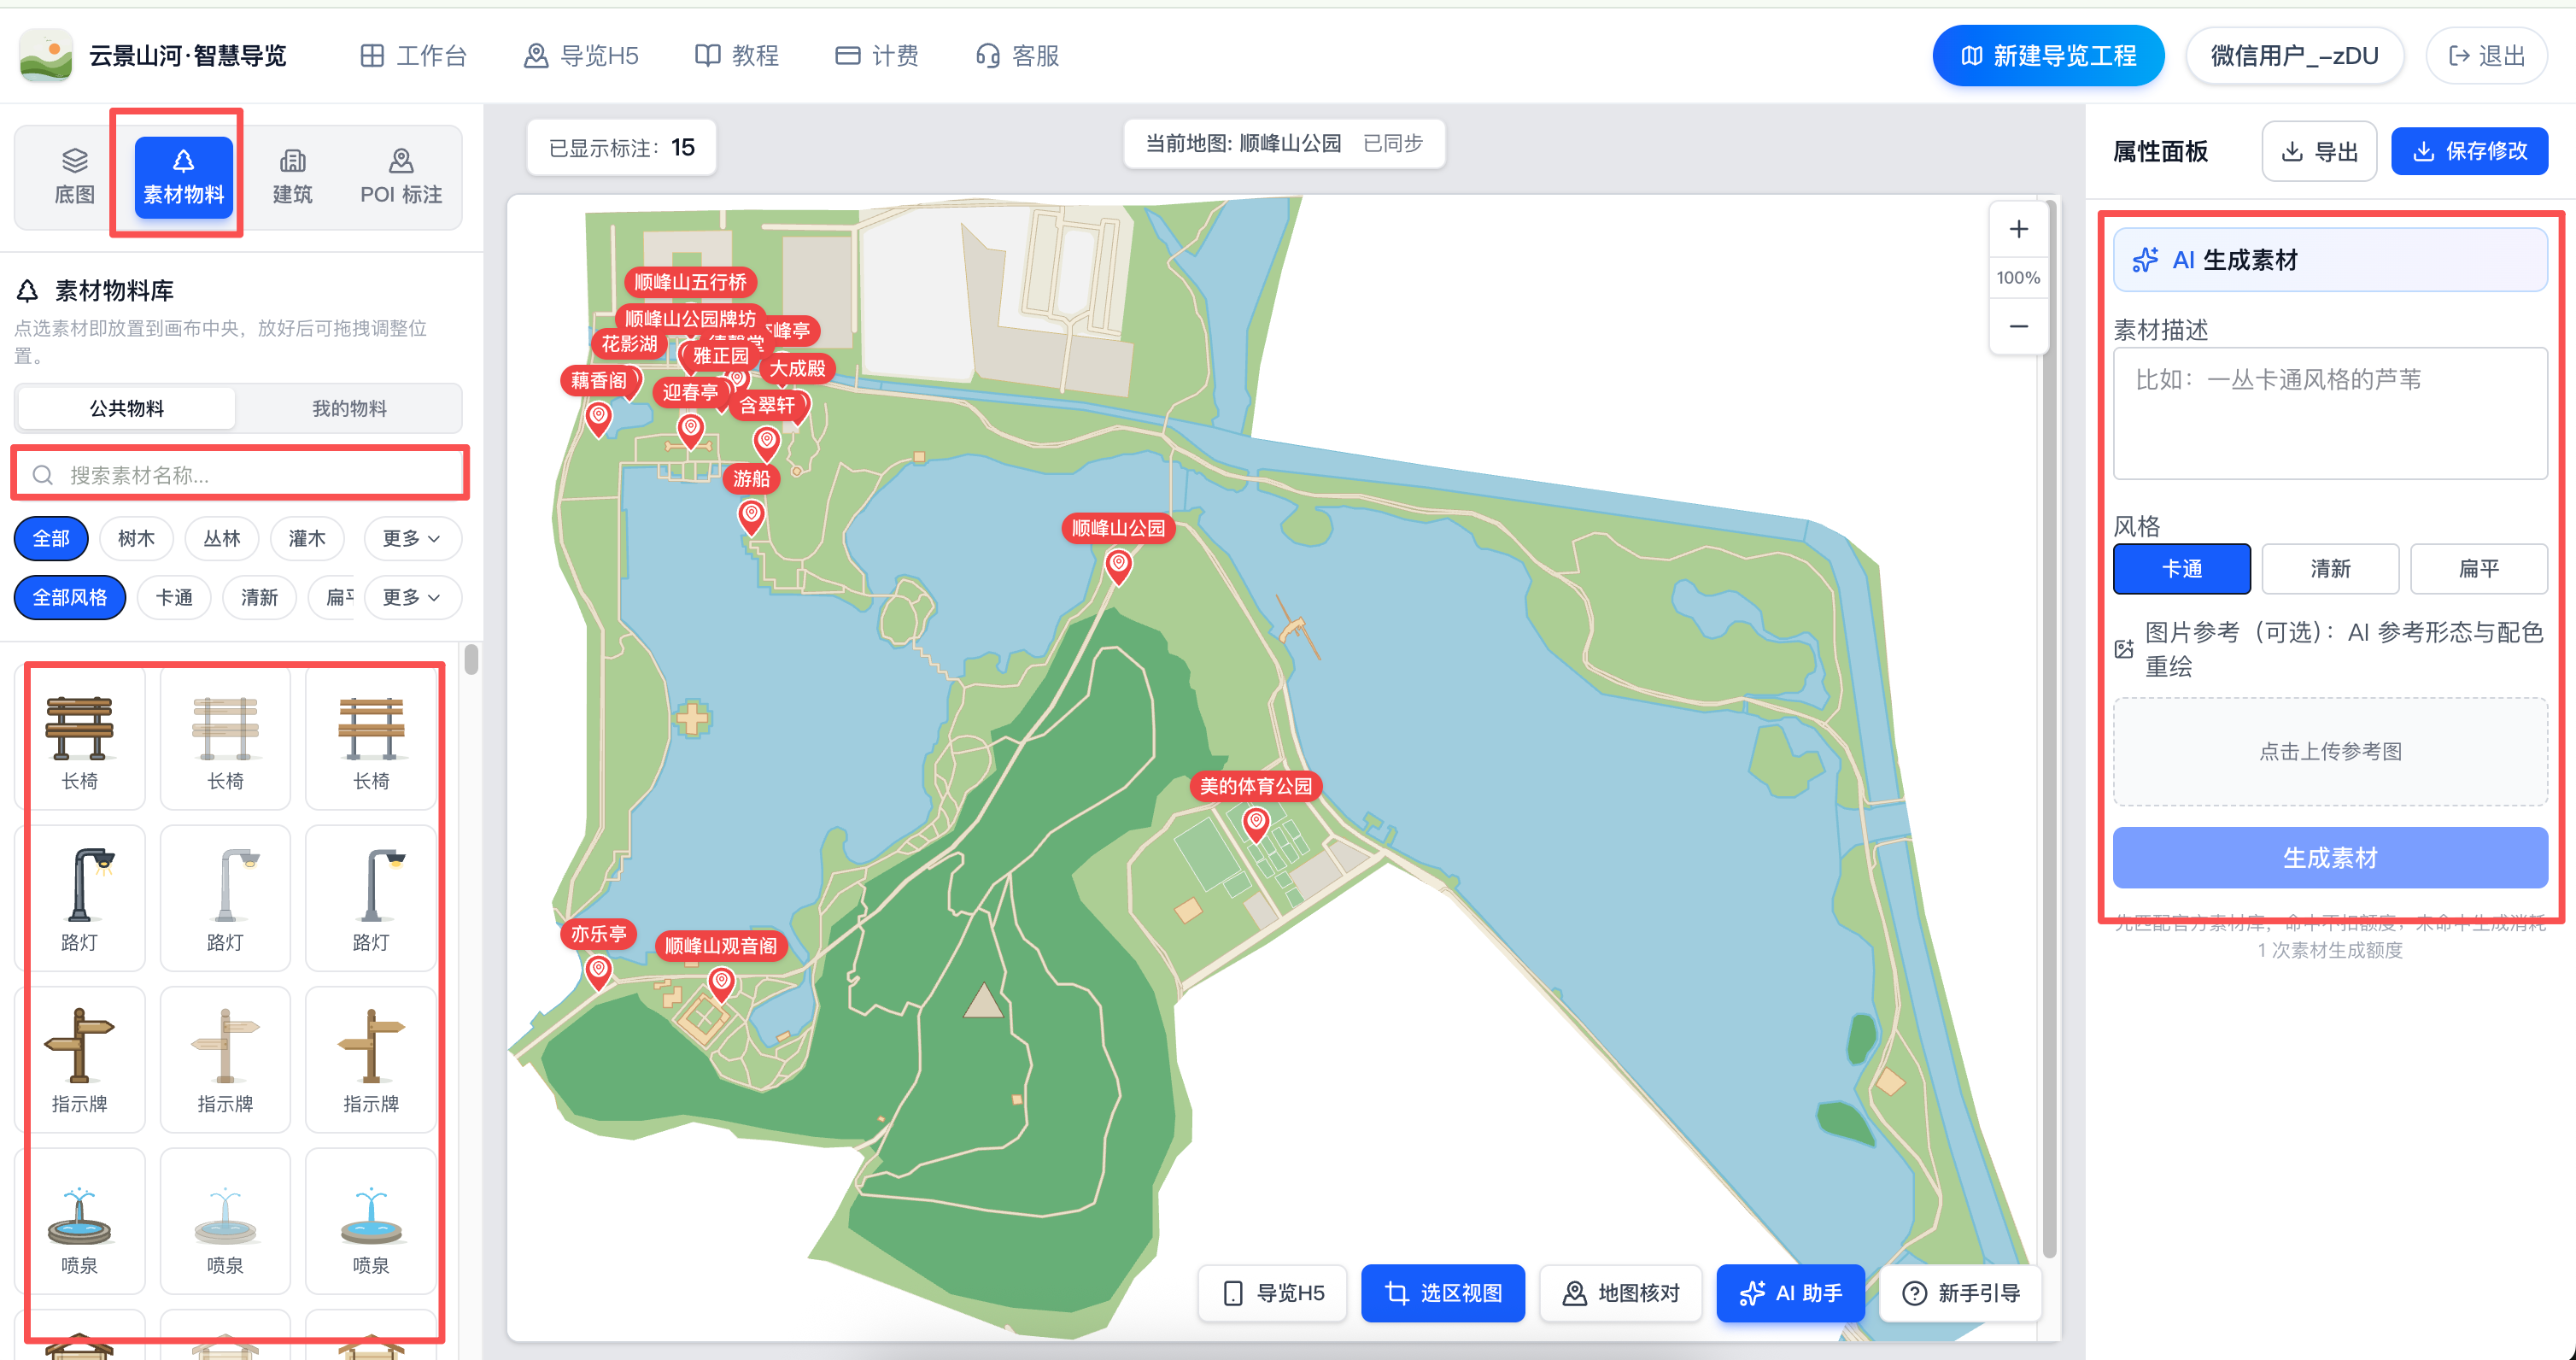
Switch to the "Materials" tab on the left side of the editor: "Public Materials" are platform-preset vector assets such as trees, flowers, rocks, and site facilities. Filter by category and style via horizontal swiping, click "More" to view the full collection, and use the top search bar to find items by name instantly.
Click to place the asset in the center of the canvas. You can then drag to adjust its position, drag the handle to resize it, flip it horizontally, change colors per slot, or switch between shape variants.
"My Materials" stores AI-generated and manually uploaded assets: enter a description in the right panel to generate exclusive assets via AI, or directly upload your own PNG / JPG / WebP images (≤5MB).
No. 4 Steps
Buildings (Public Library / My Buildings / AI Generated)
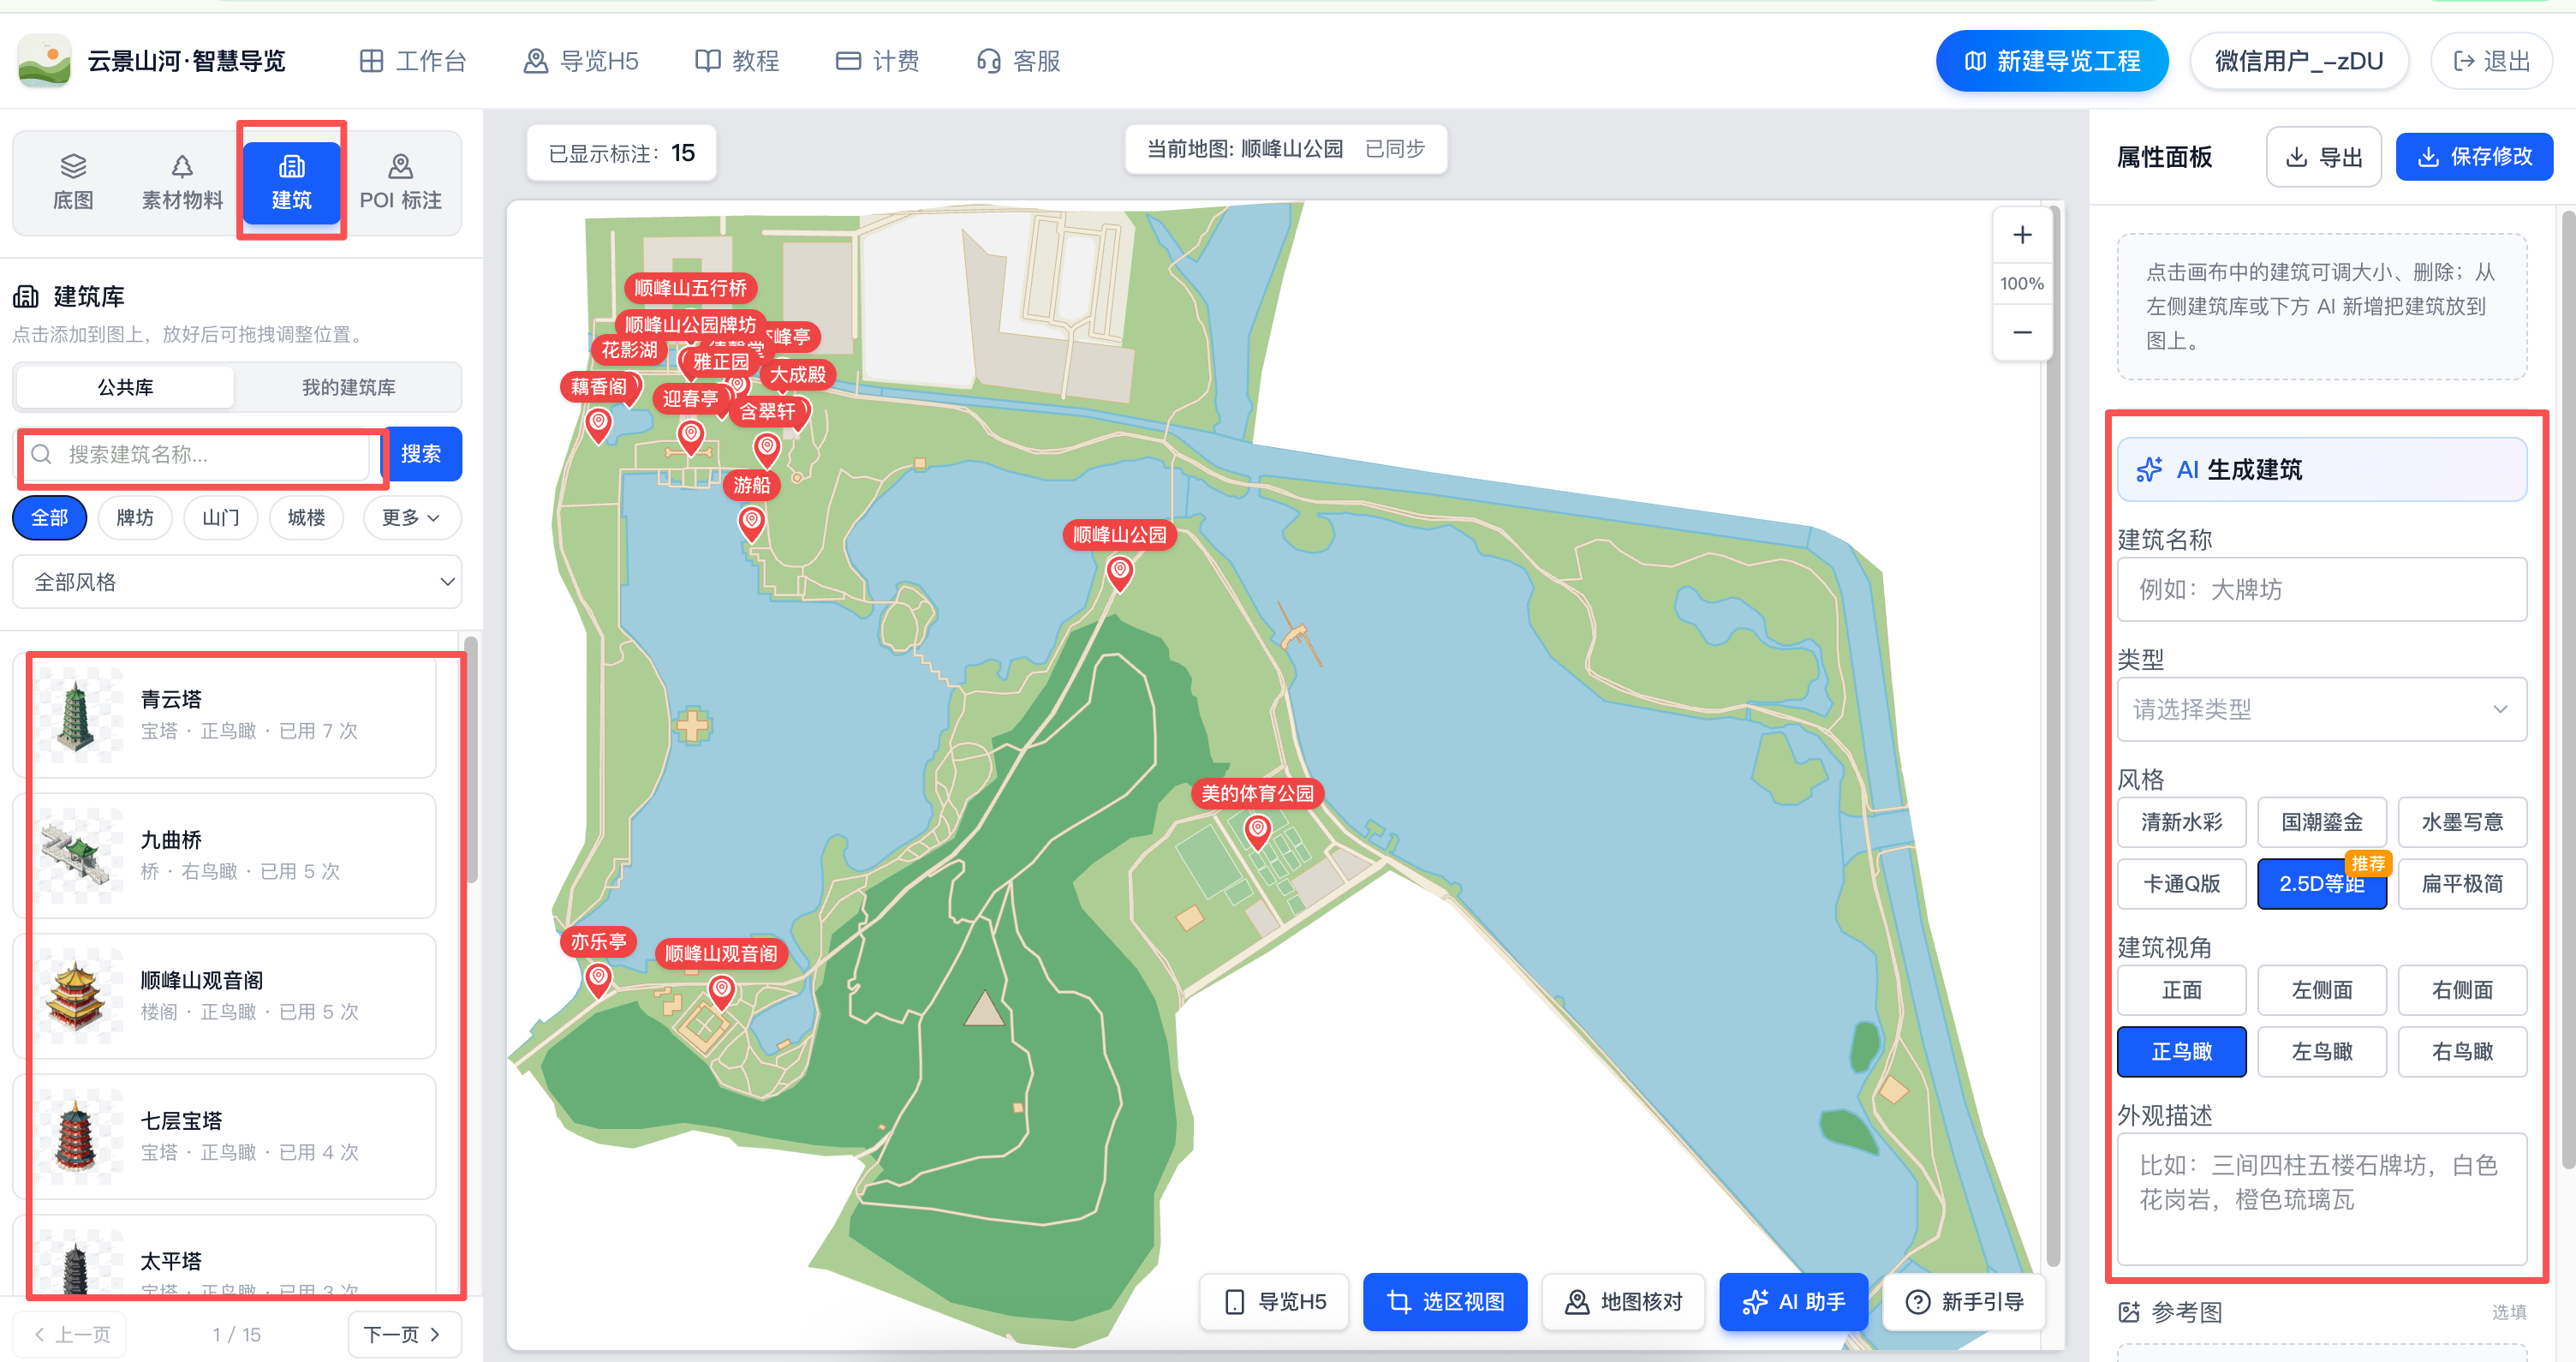
The public library in the "Buildings" tab includes building illustrations of various types and styles such as pavilions, corridors, bridges, pagodas, and gate towers. It supports type filtering and name search; click to place on the canvas.
After placing a building, drag to adjust its position, drag the bottom-right handle to resize, or flip it horizontally. If the angle is not suitable, click "Quick Angle Change" to redraw from a new perspective.
"My Buildings" stores AI-generated and favorited building assets, with the same placement and editing methods as the public library.
No. 5 Steps
Venue facilities and stretching
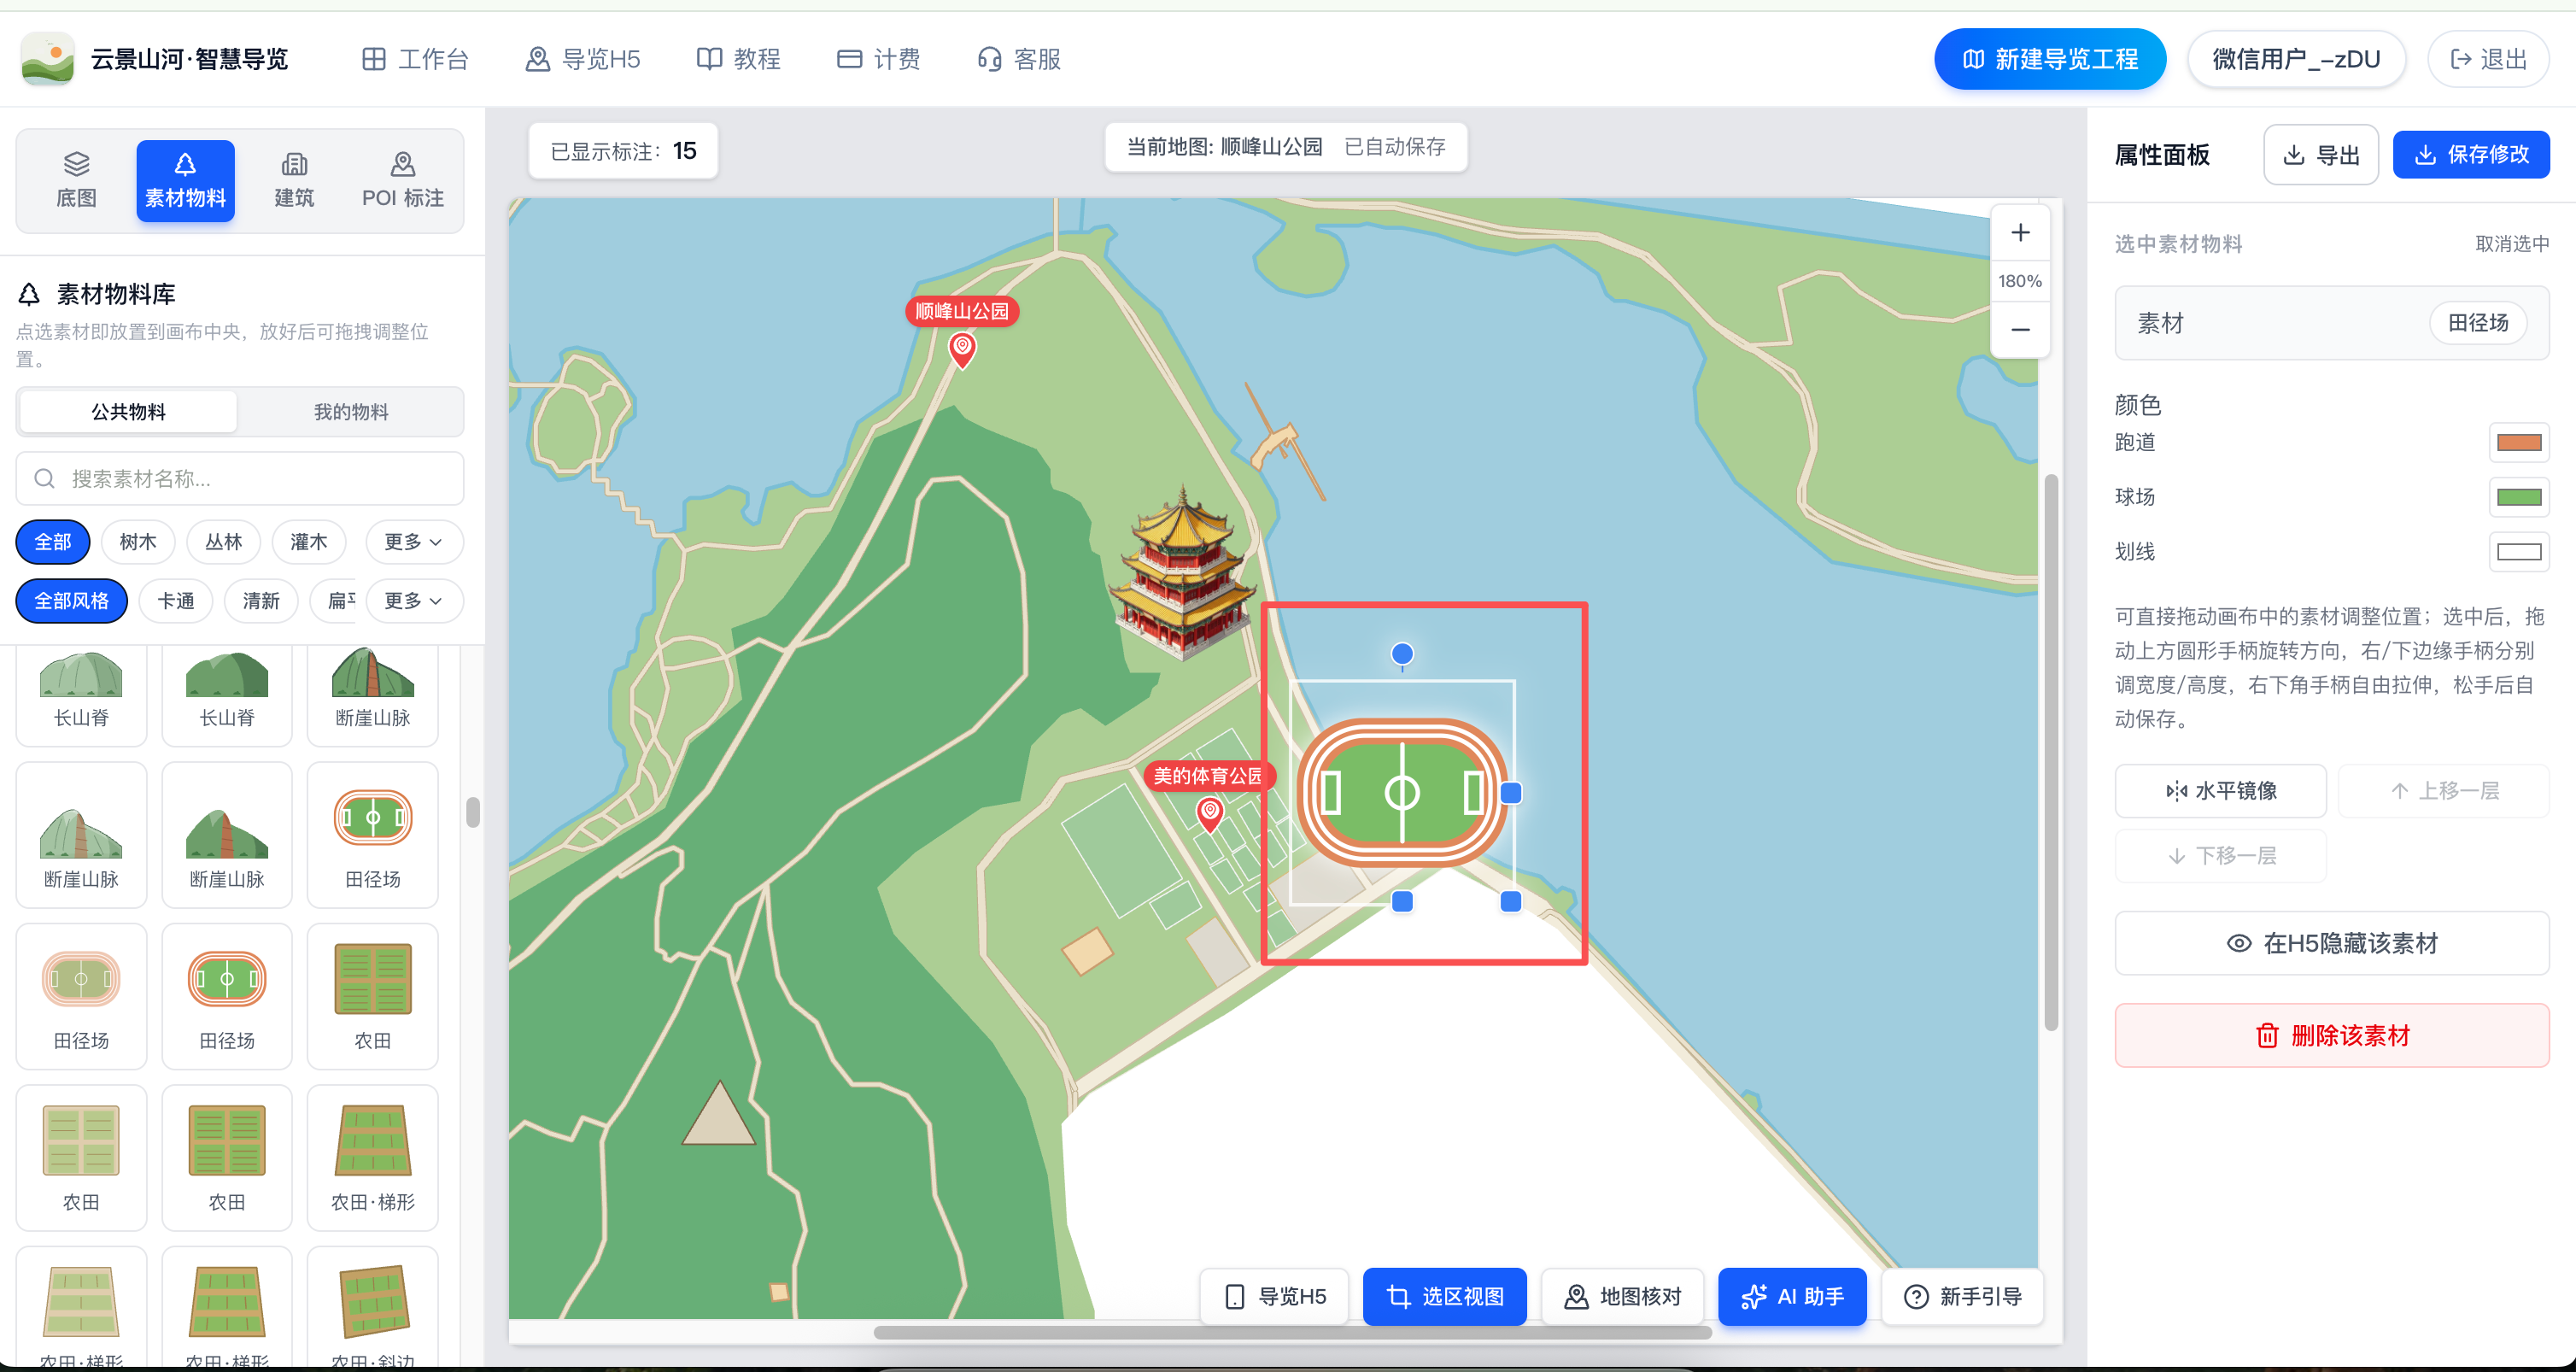
Venue facility assets such as fences, football fields, basketball courts, badminton courts, parking lots, and swimming pools support independent width and height stretching to fit plots of any shape.
Three blue handles will appear after selecting a facility: drag the right edge handle to adjust only the width, the bottom edge handle to adjust only the height, and the bottom-right handle to freely stretch both width and height. Changes are saved automatically when you release.
No. 6 Steps
POI Annotation
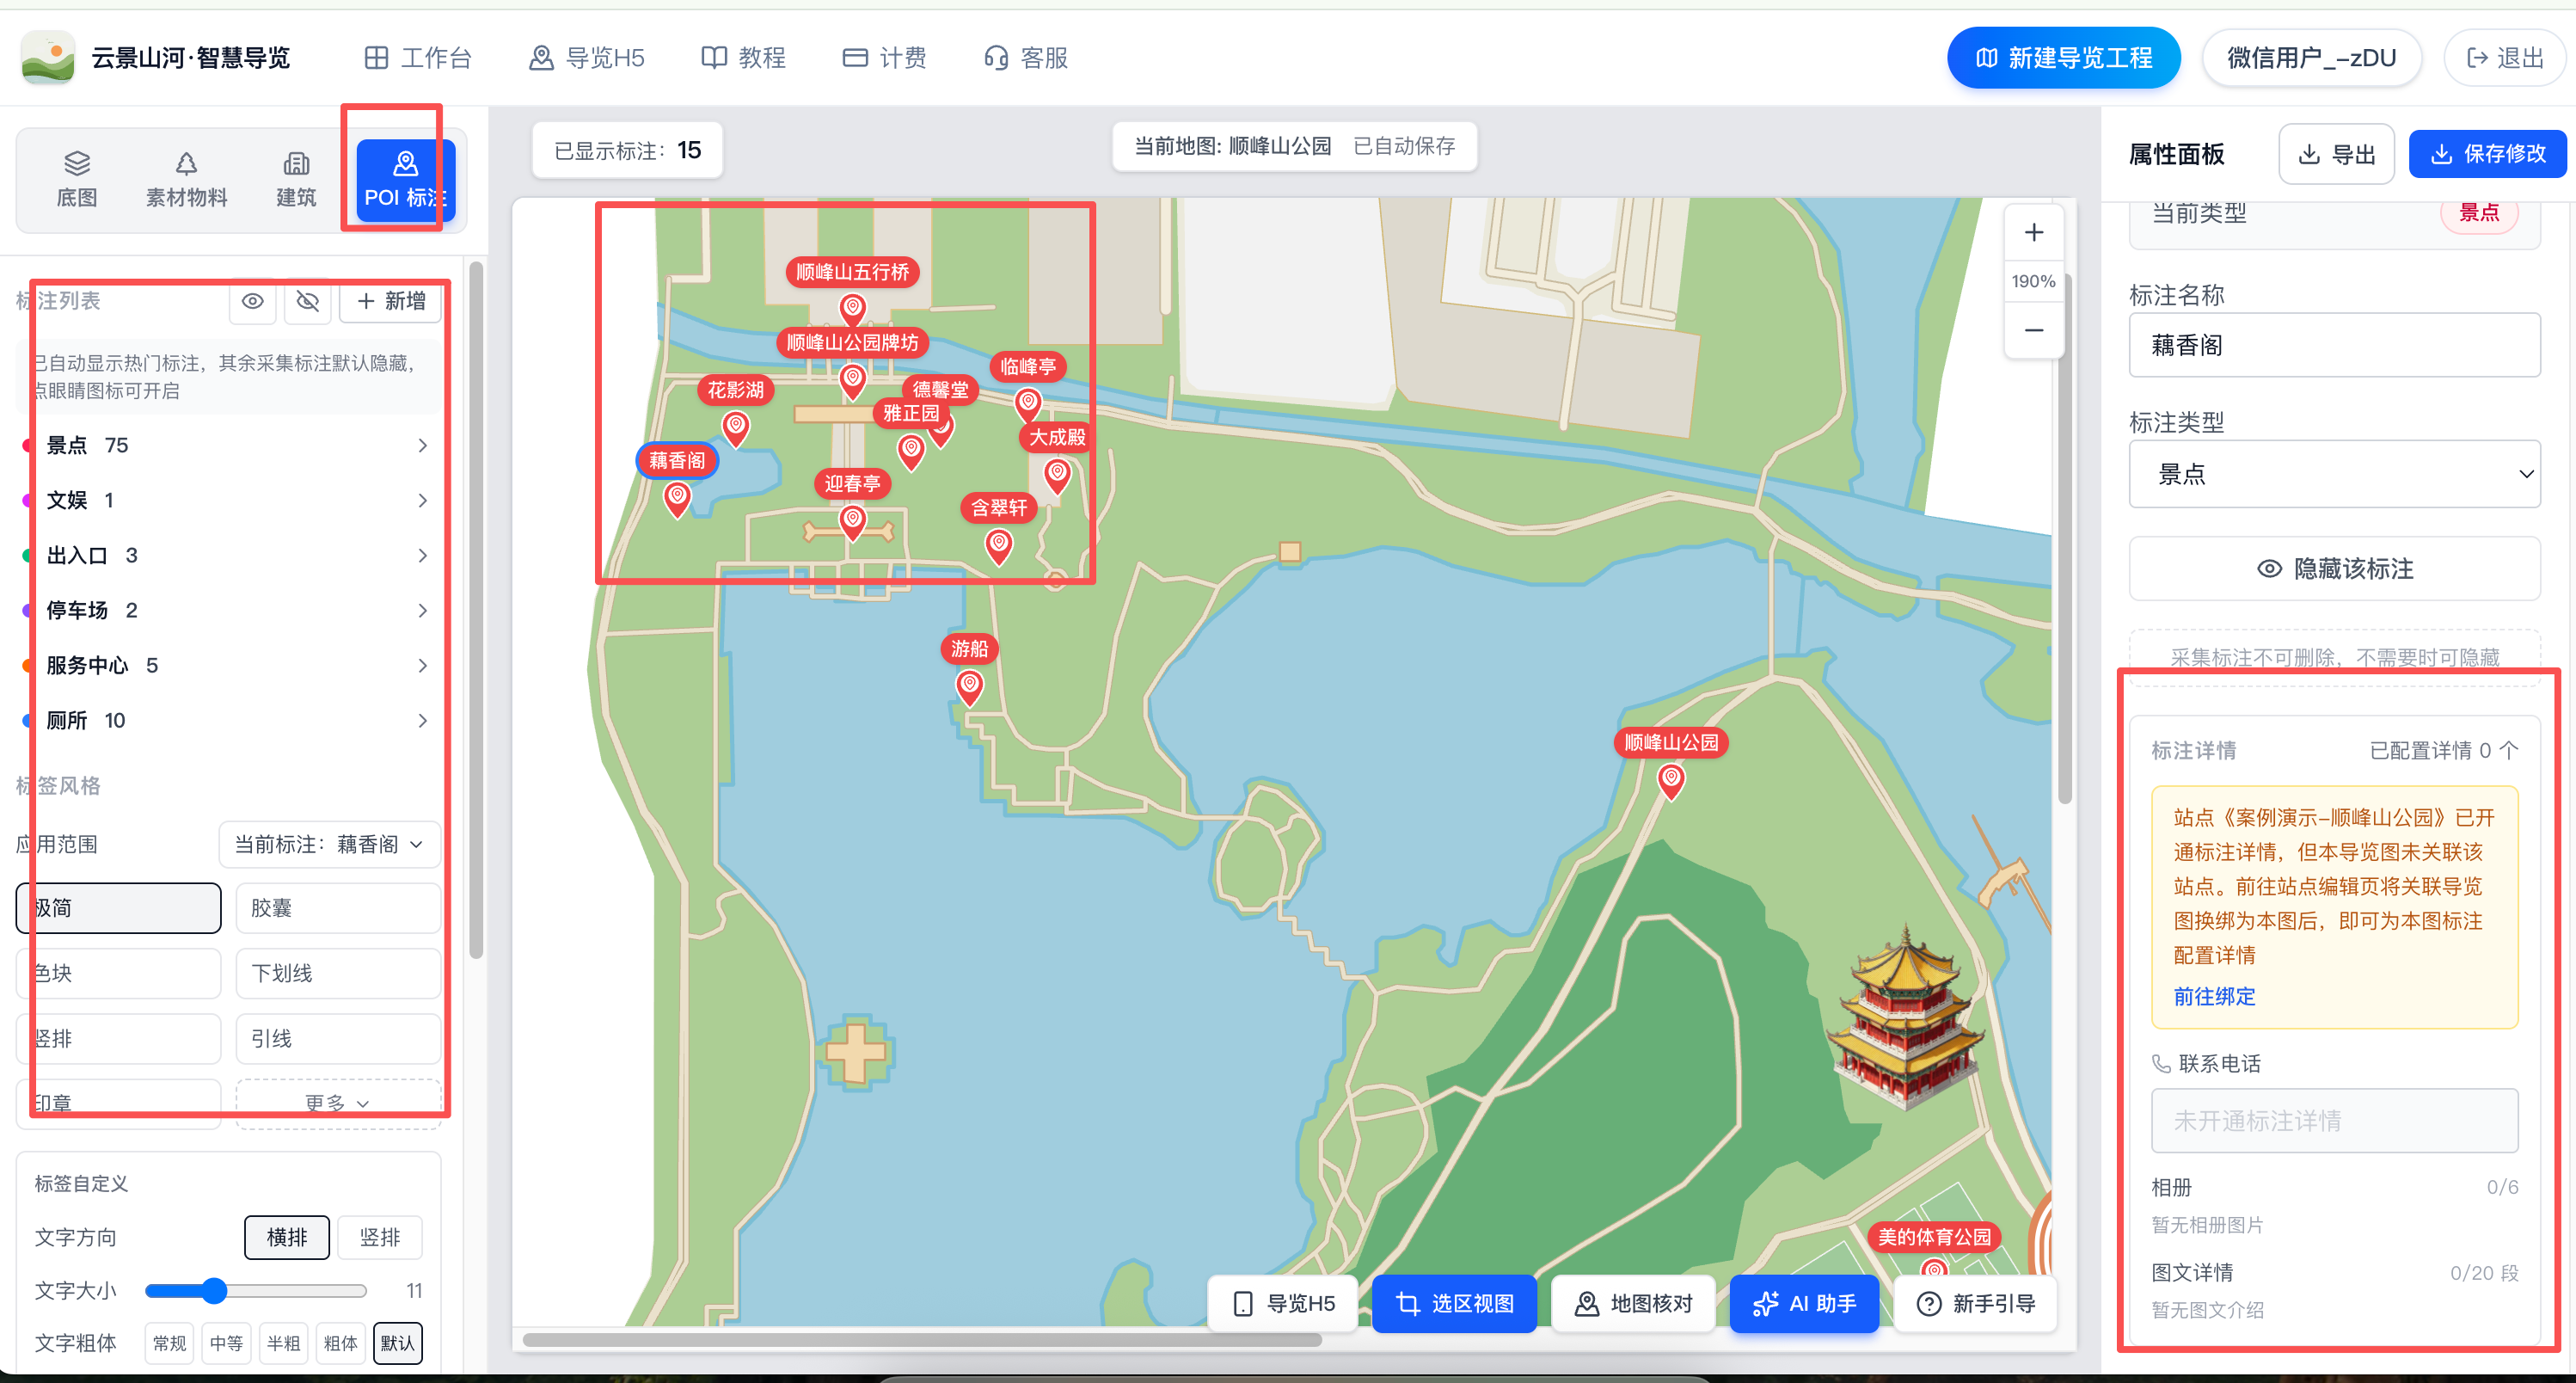
The "Annotations" tab allows you to add annotations for attractions, check-in spots, dining, entertainment, hotels, entrances/exits, parking lots, service centers, restrooms, and more. Click the canvas to place or drag to adjust position; use arrow keys for fine adjustment (hold Shift for larger steps).
Name each marker, upload images, and add a description and contact number. Traditional Chinese and English H5 guides are coming soon.
No. 7 Steps
Area Selection Recoloring
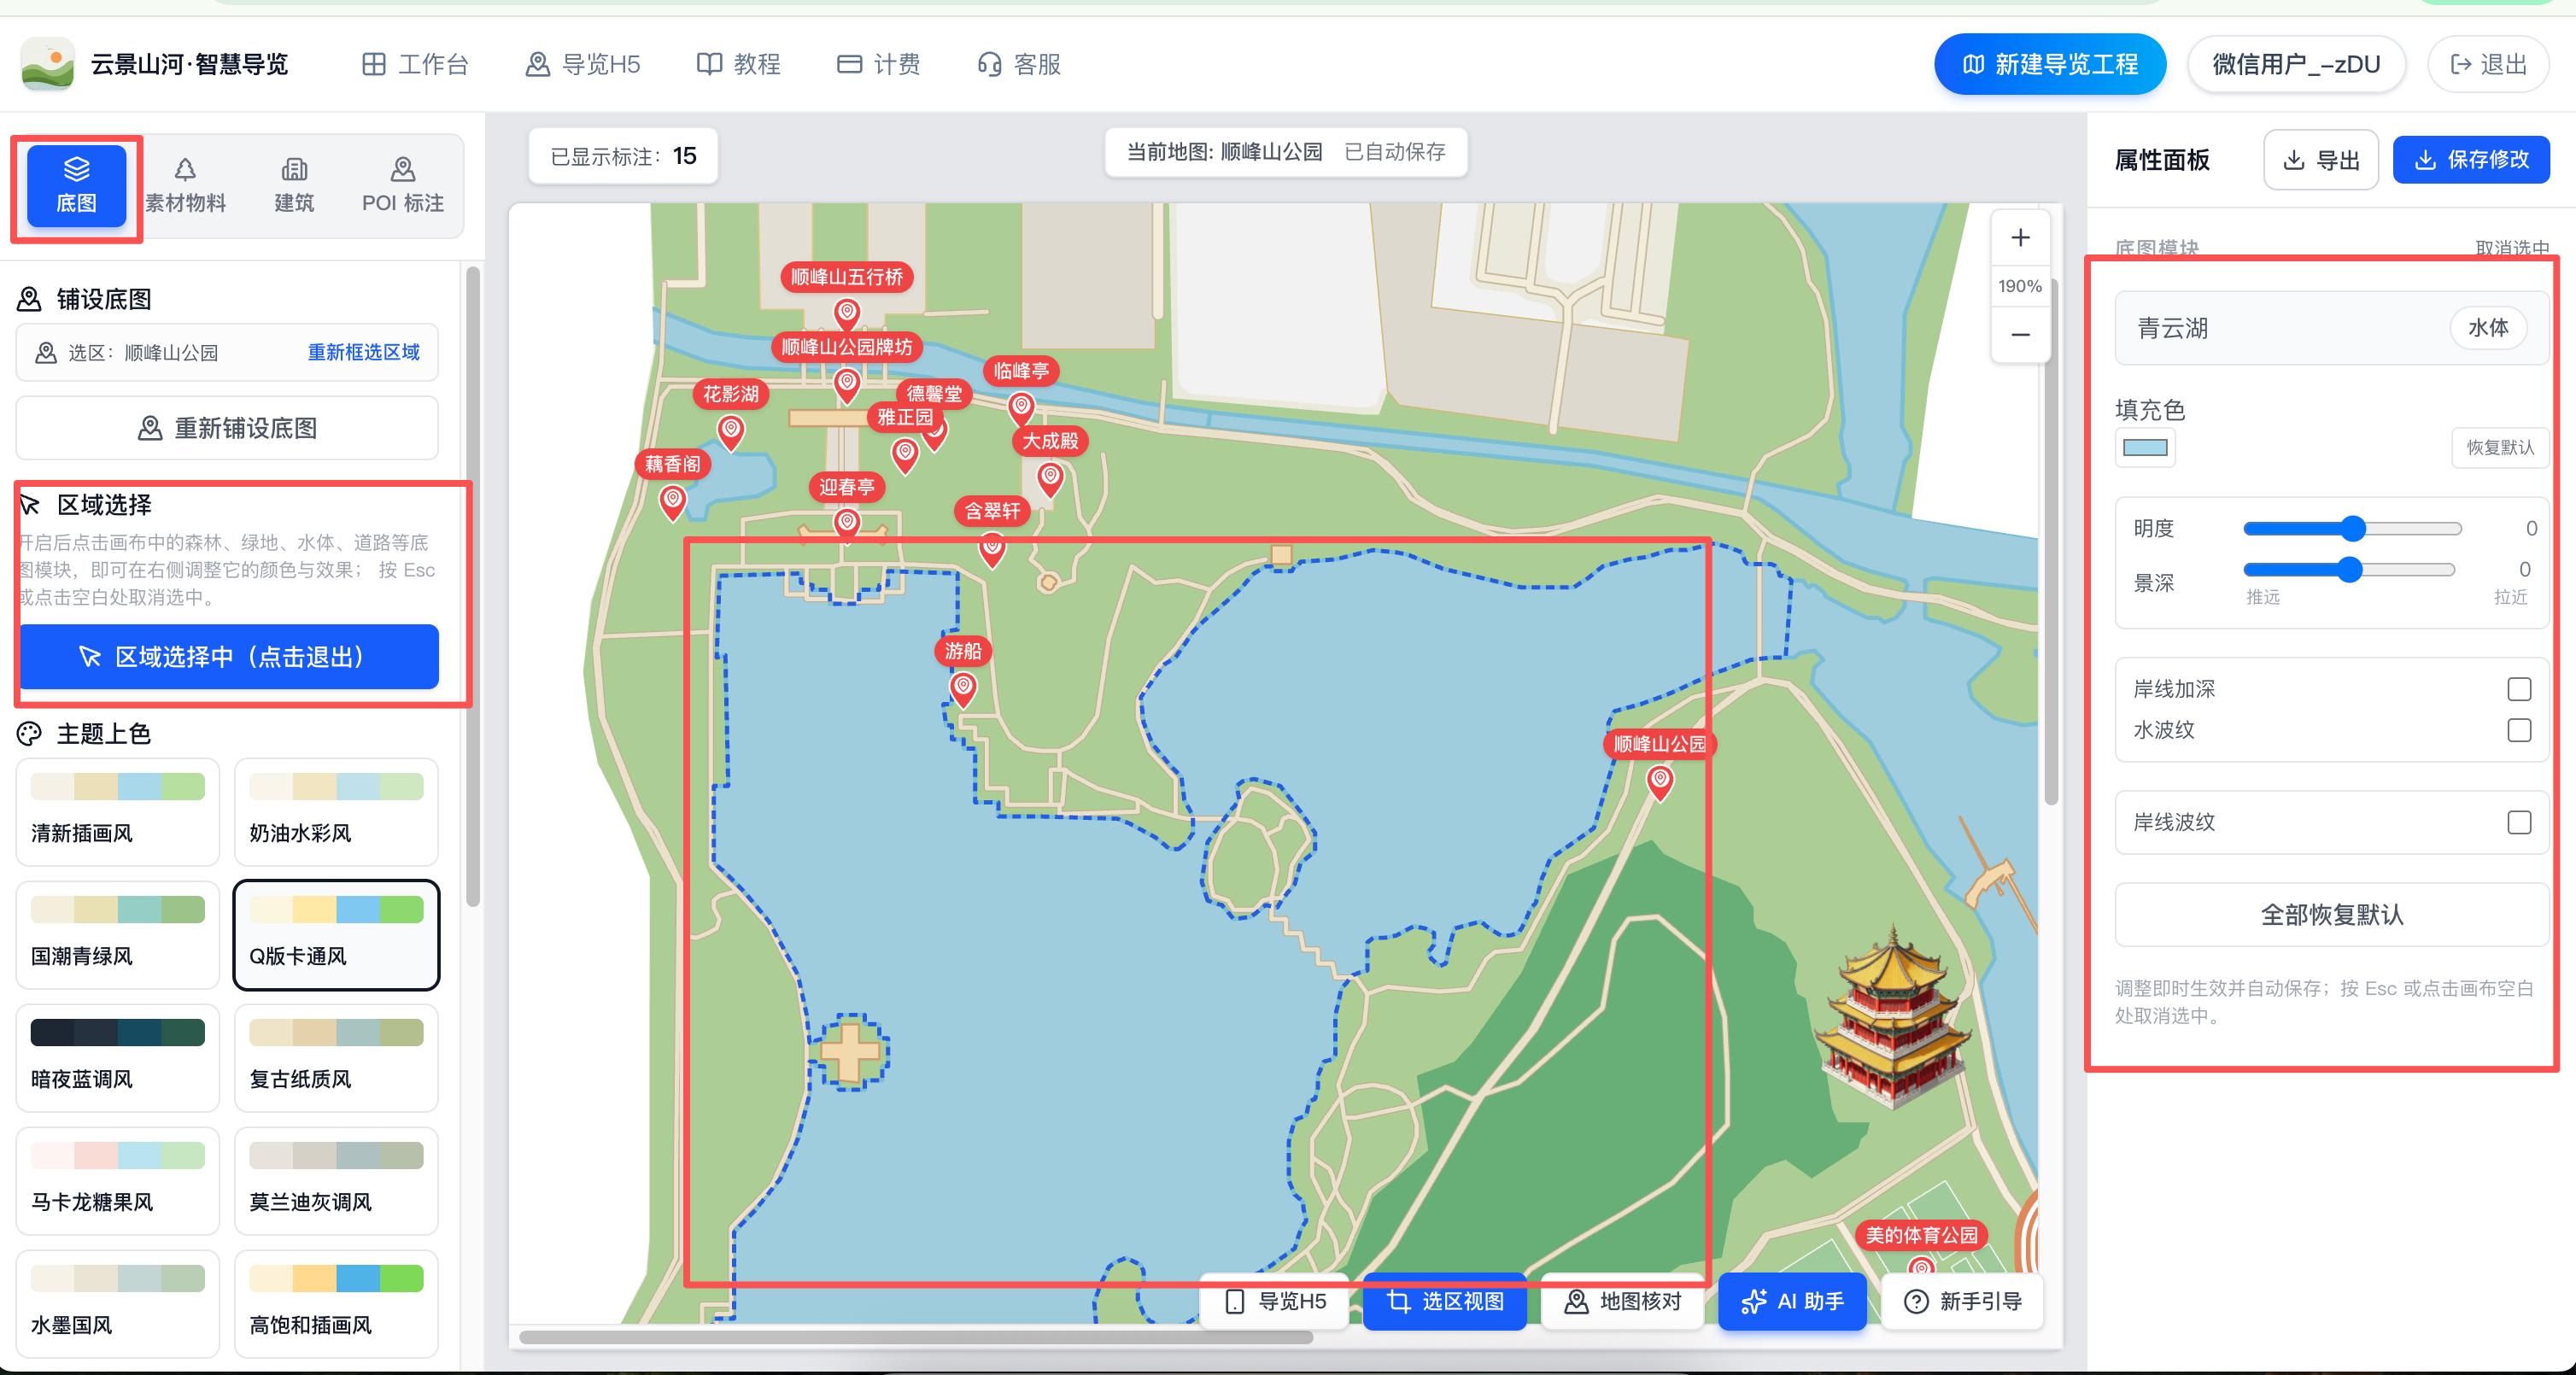
After clicking "Enable Area Selection", click any module on the base map with your mouse — a patch of green space, a section of water, or a building block — to adjust the color of only that module, achieving zoned color matching.
If you are not satisfied with a locally drawn area, you can select it and redraw that module separately without affecting the rest of the map.
No. 8 Steps
Export
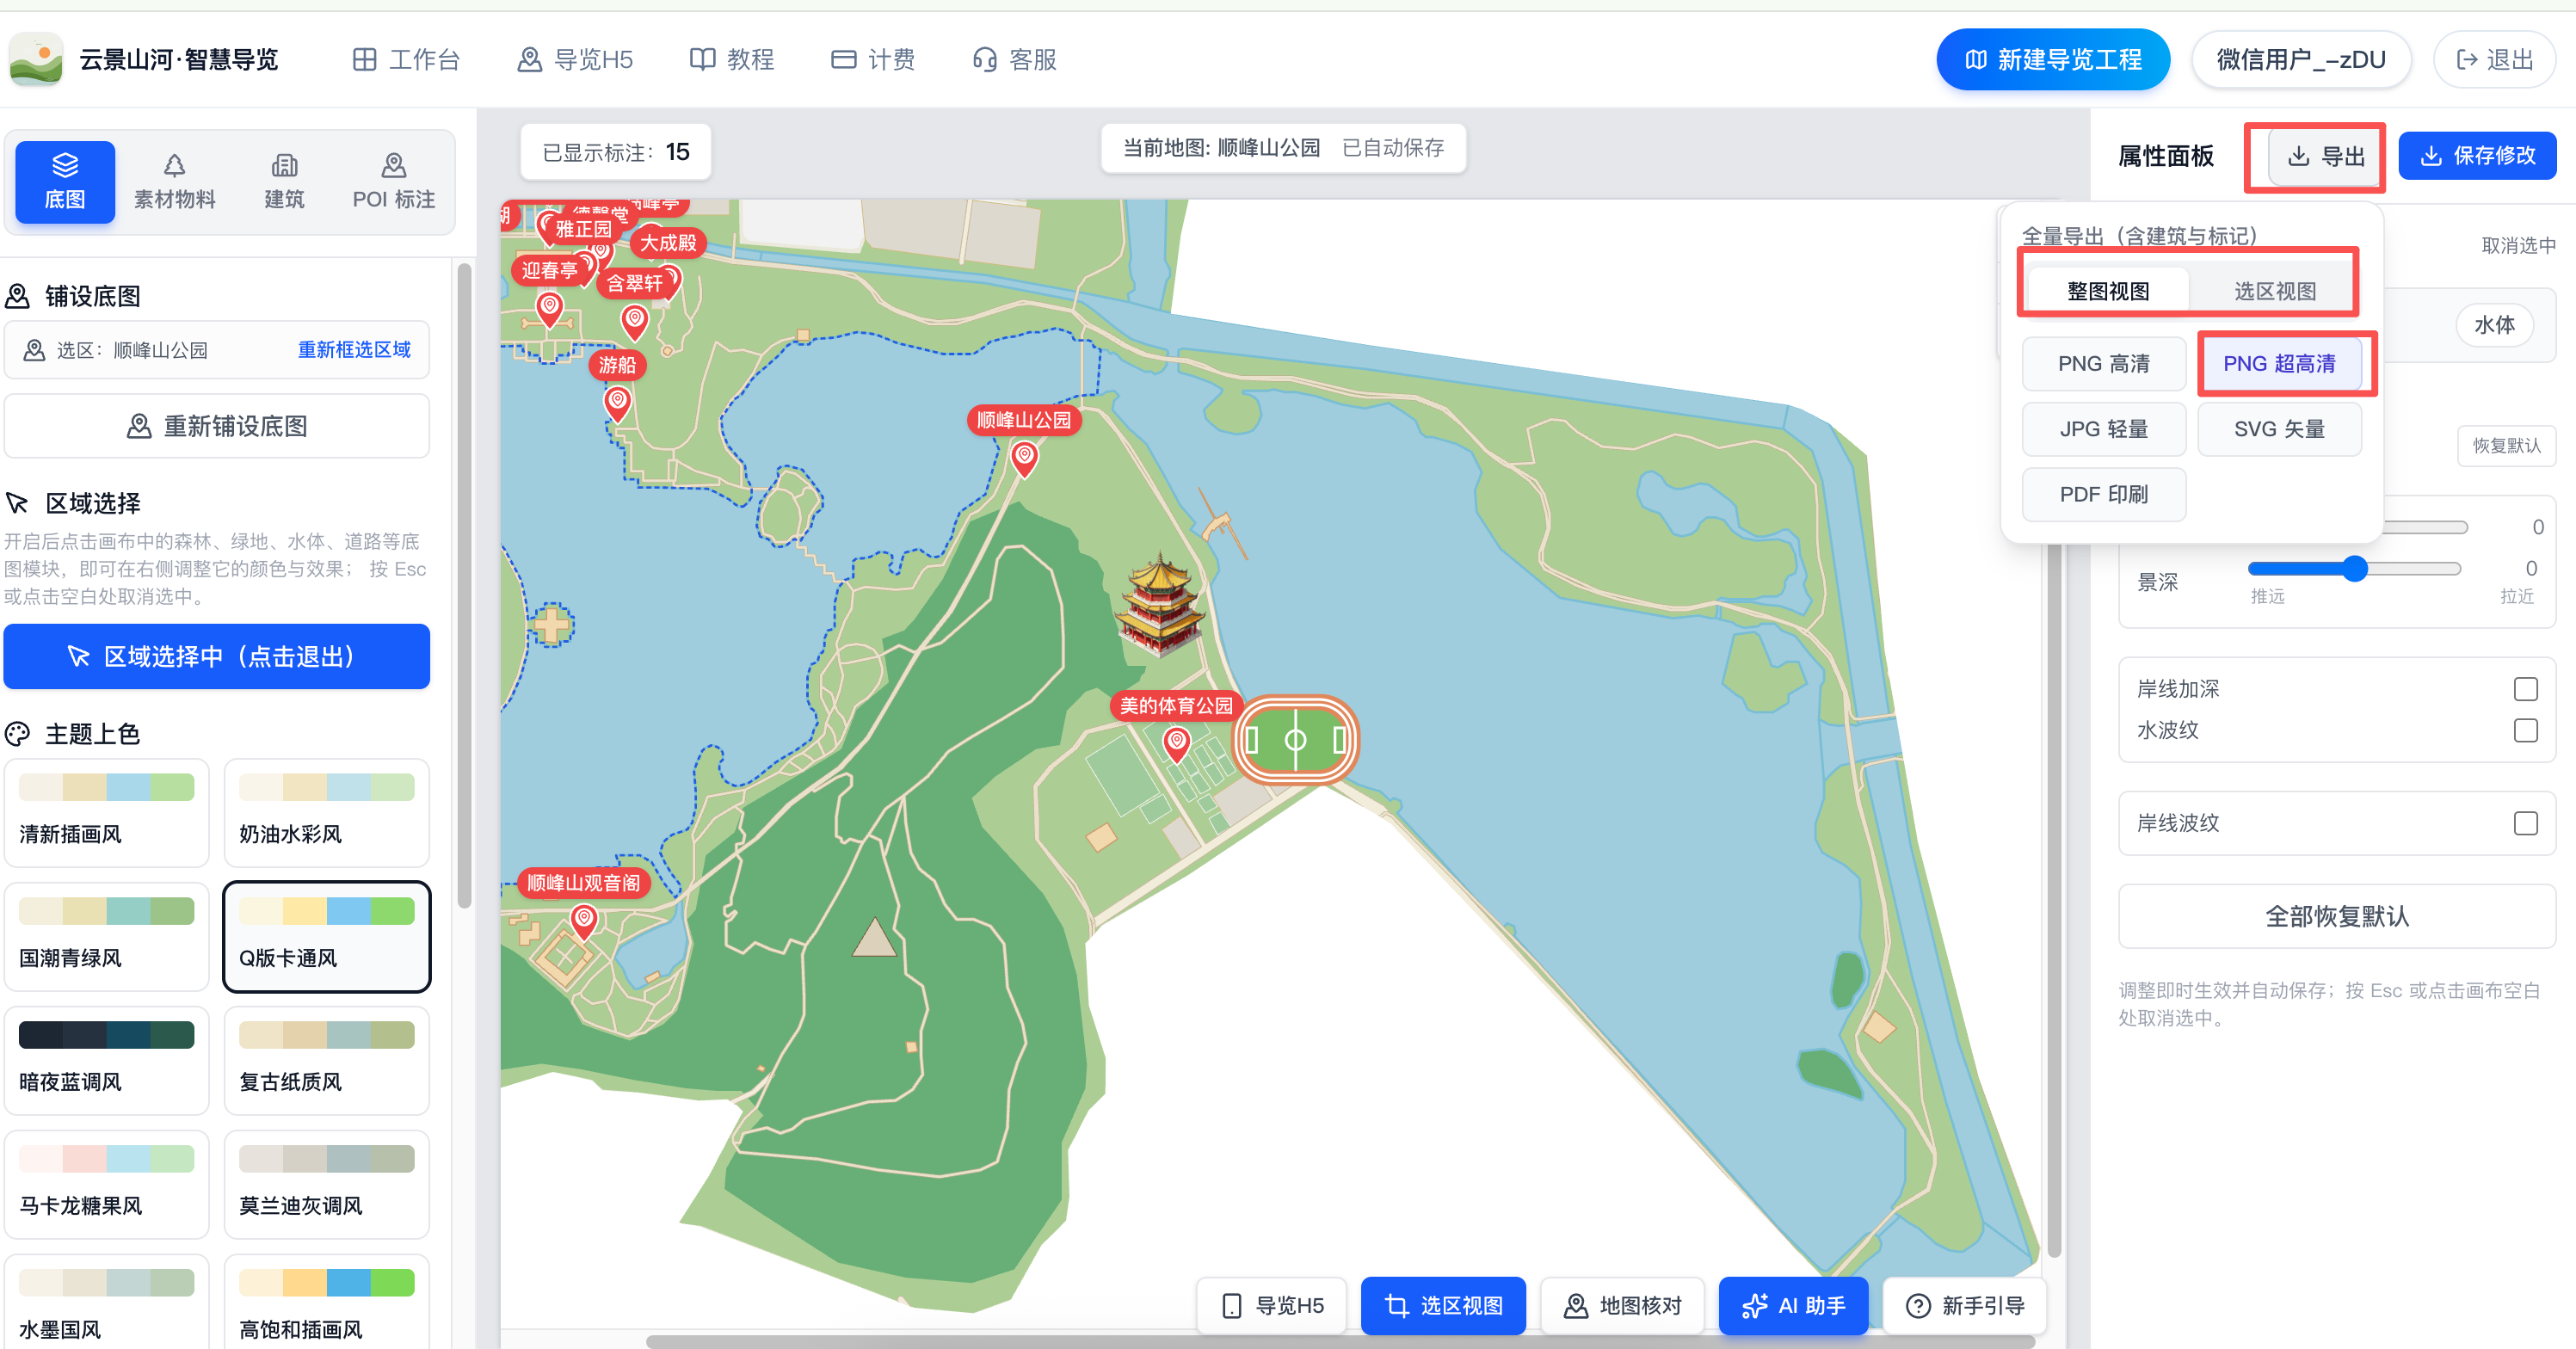
You can export the Illustrated Map as PNG / SVG / PDF and other formats from the export menu in the editor or the project card on the workspace.
PNG is suitable for online promotion and social sharing; SVG / PDF are vector high-definition formats that can be scaled infinitely, ideal for offline materials such as printed display stands and guide signs.
No. 9 Steps
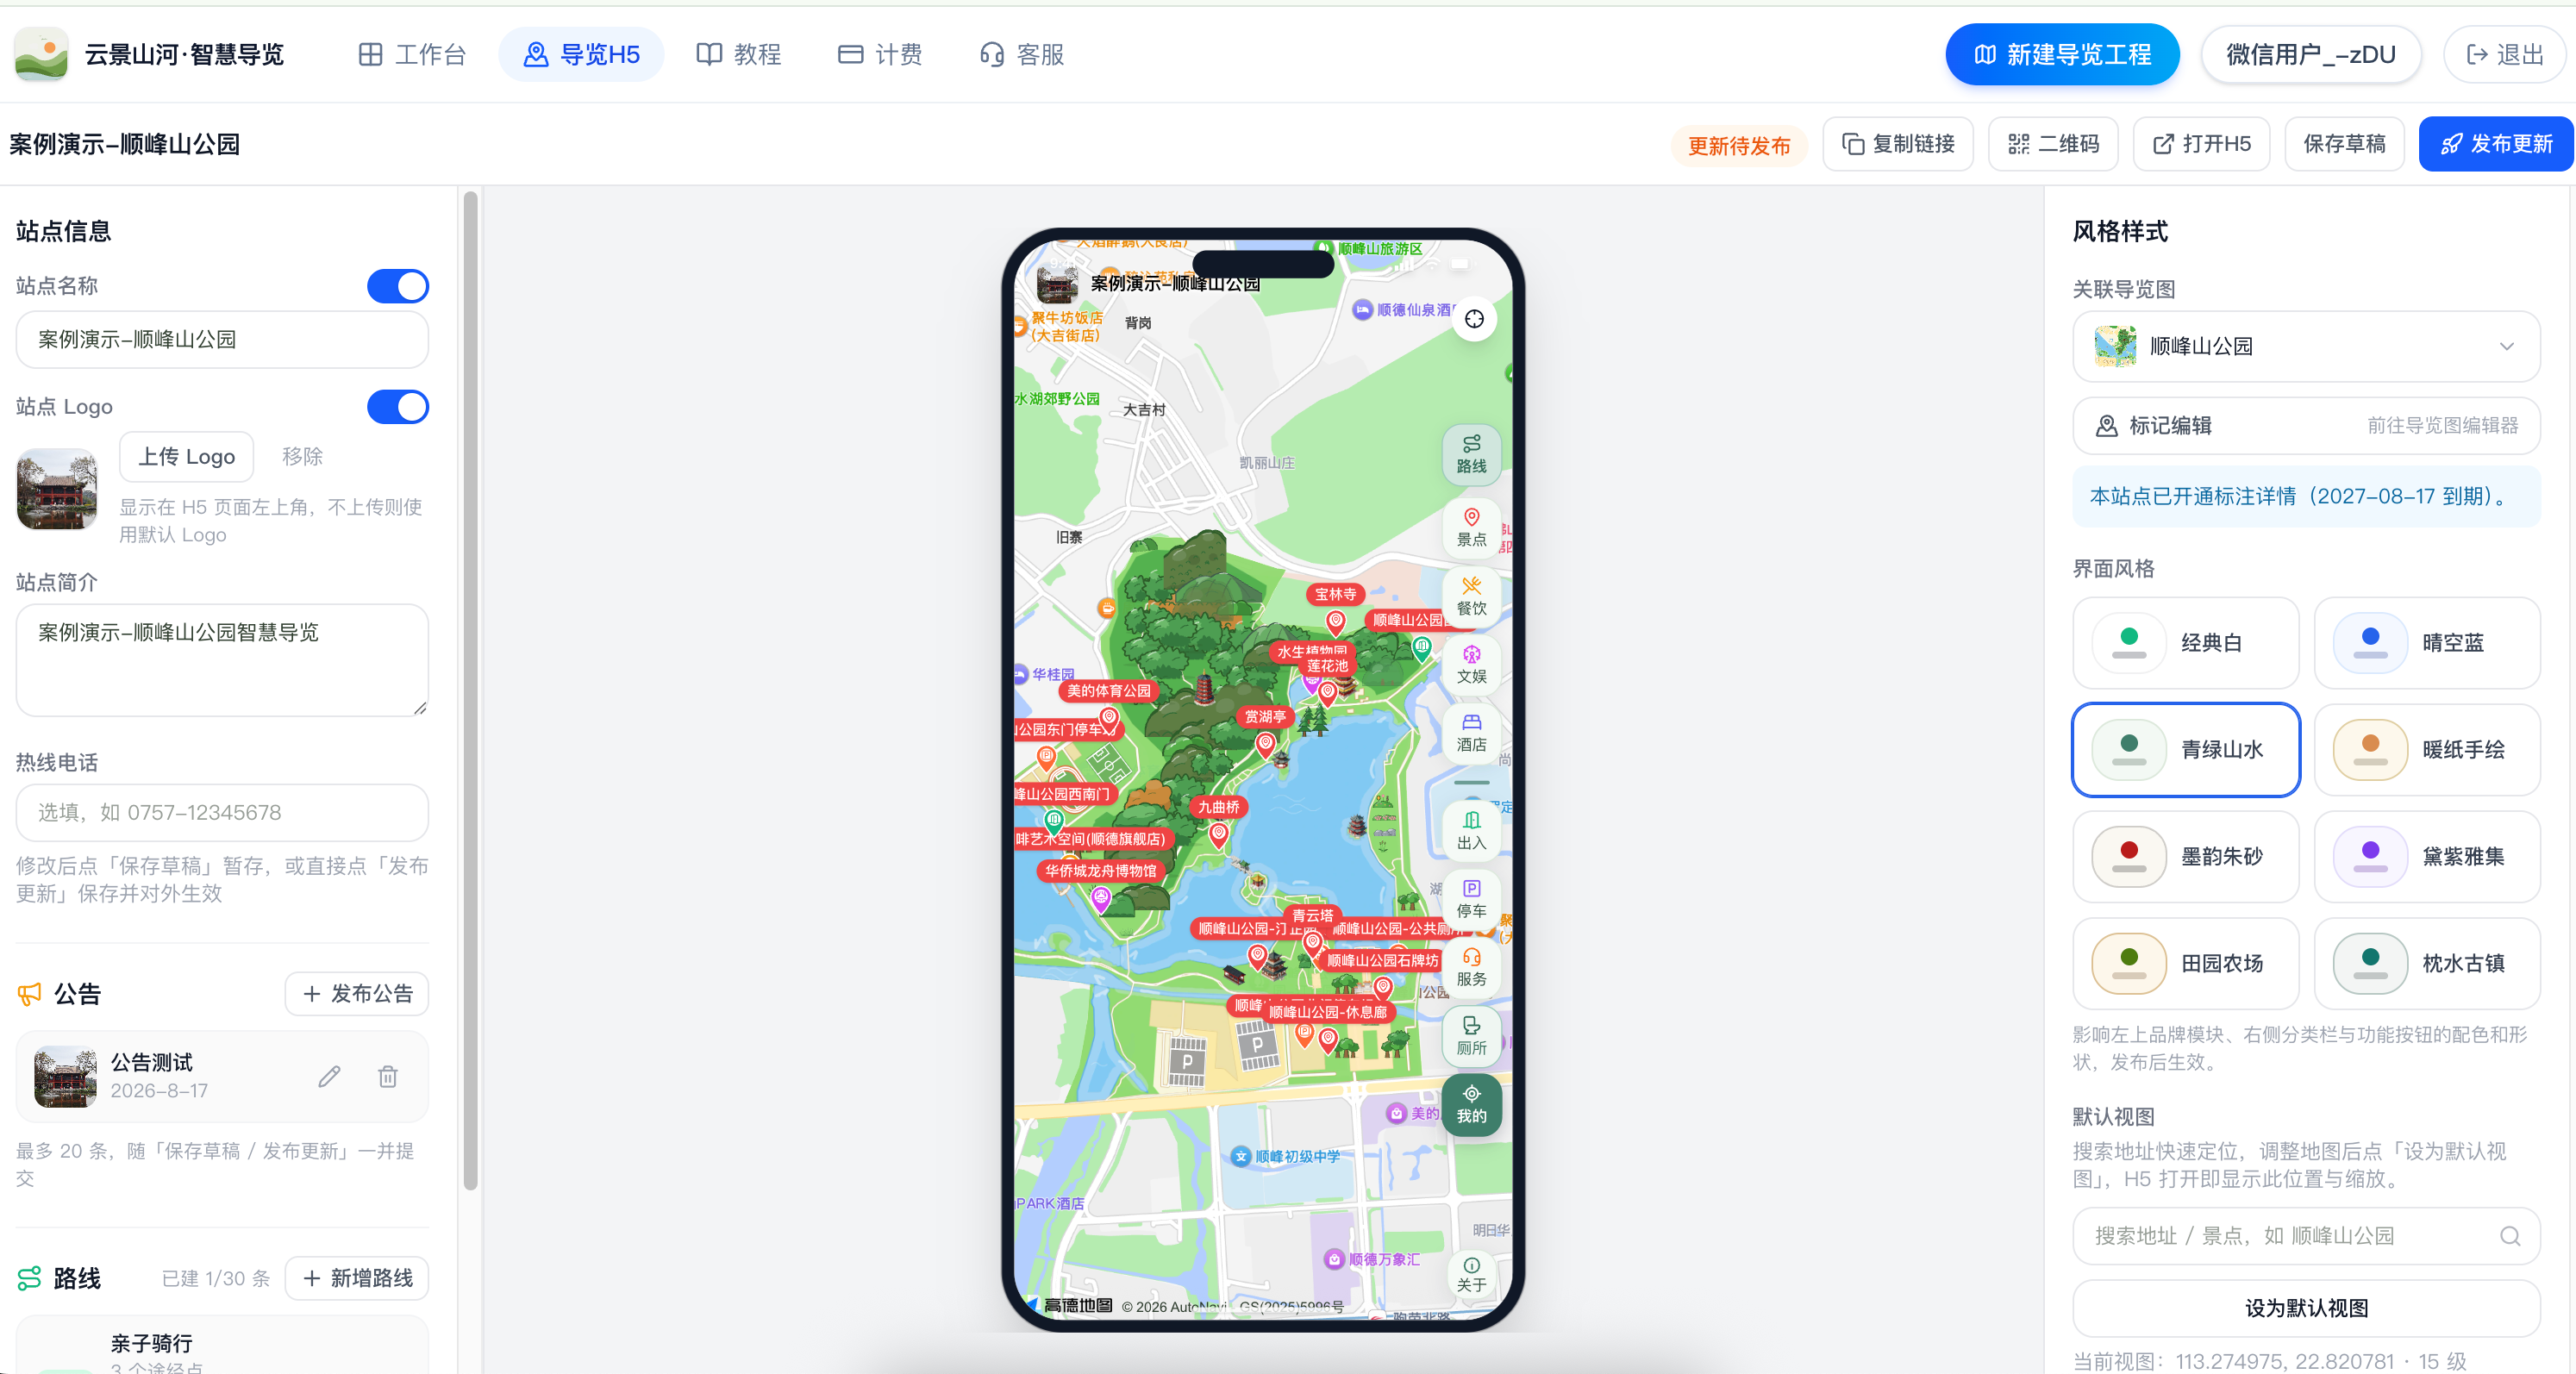
Publish Digital Guide H5
Traditional Chinese and English Digital Guide H5 are coming soon. You can create, edit and export illustrated maps now.
After finishing the tutorial, create your first illustrated map
The free quota allows you to experience the complete generation process. If you encounter problems, please contact us on the "Customer Service" page at any time.
Create a guide for free